- Published on
Installing Java on Ubuntu 14.04
Installing Java with apt-get is easy. First, update the package index:
sudo apt-get update
Then, check if Java is not already installed:
java -version
If it returns “The program java can be found in the following packages”, Java hasn’t been installed yet, so execute the following command:
sudo apt-get install default-jre
After you run the above code it sets up everything.
Installing Oracle JDK (optional)
If your going to use android studio it will recommend you use Oracle JDK because this is official JDK.
In order to install this.
sudo apt-get install python-software-properties
sudo add-apt-repository ppa:webupd8team/java
sudo apt-get update
For Oracle JDK 6
sudo apt-get install oracle-java6-installerFor Oracle JDK 7
sudo apt-get install oracle-java7-installerFor Oracle JDK 8
sudo apt-get install oracle-java8-installer
Install any one of these. After installing java we need to set the Environment Variables as JAVA_HOME. In order to set the env. Execute following code.
sudo update-alternatives --config javac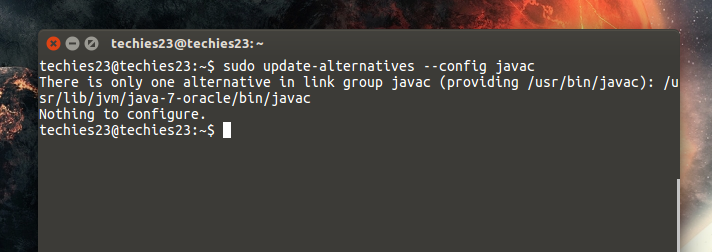
When you enter the code if you have only installed one then it will show you like this otherwise it will show you list of installations. You can choose anyone you like if you have choices.
Setting Up JAVA_HOME
Now, for setting up environment variables you need to first find the path where your Java is installed. When we ran the code sudo update-alternatives –config javac we got a path like: /usr/lib/jvm/java-7-oracle/bin/javac copy this path and do the following on terminal.
sudo nano /etc/environmentNow, running this code will give you following screen.
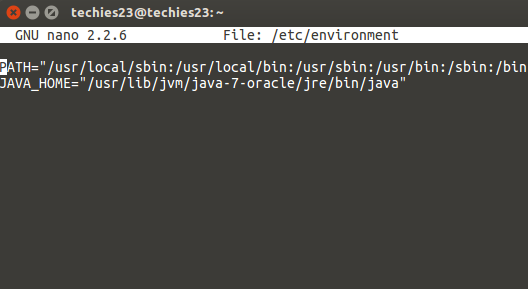
In this file, add the following line just like shown in the picture.
JAVA_HOME="YOUR_PATH"We have setup the variables. In order to check refresh the file using source /etc/environment and execute
echo $JAVA_HOMEIf this runs, we have succesfully setup JAVA.