- Published on
Setting up Next JS with Docker and File Sync
Today we are going to look at how we can setup our NextJS application in Docker with Hot reloading feature. For this tutorial we are going to use Next.js with Docker. Note: This works with Next.js version 13 as well.
So, firstly we are going to look at what is Docker in simple terms and get started with the implementation. You can simply take examples of containers containing certain elements which is excluded from other similar containers. So, we use Docker in order to isolate a certain application environment which can be then exported to another device without the hassle of conflicts and dependency errors.
In this tutorial we will be using docker-compose command to setup our next.js application into a Docker container. There are two commands that can be used to create Docker containers for example:
- Docker build
- docker-compose up –build
The major difference between the two is “Docker” command can only run single instance of the Docker Container while using docker-compose we can run multiple docker containers where we can configure that from a yaml file. I won’t go in detail here about this, you can just google this stuff up easily.
So, let’s get started with the implementation. In order to get started you’ll first need to install Docker on your machine which you can get from below link.
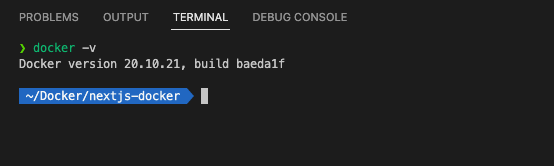
In order to verify if you have Docker already installed run the command docker -v in your command line or terminal.
After this, we create a next.js project on our local. Let’s run the create-next-app line in our terminal. We’ll be using npm for this tutorial.
npx create-next-app --example with-docker next-with-docker
After create the next app you’ll see a file named Dockerfile in your next.js application root directory like in the below screenshot.

By default when we create out next.js application with the flag with-docker next.js will add certain commands itself. In this tutorial we will be overriding those with a bit simple code so that it may be easy to get started on our development server first.
So, our Dockerfile would look like below.
# Install dependencies only when needed
FROM node:16-alpine
RUN mkdir -p /app
WORKDIR /app

# Install dependencies based on the preferred package manager
COPY package*.json /app

RUN npm install

COPY . /app

# Exposing the Application Port
EXPOSE 3000

CMD ["npm", "run", "dev"]
- We are starting from the base image node:16.
- Create directory using mkdir -p /app
- Set the working directory as /app
- copy the package.json to install all the dependencies
- We need to install all the dependencies
- Exposing the port 3000
- Finally, we run the command npm run dev
Now, if you run cd into your next project and run the following code it will create the docker image for you. However, there is a slight problem with this approach.
docker build -t next-with-docker .
With this approach when you change the code from your local copy of next application it won’t be directly reflected and updated on the container so, we’ll need to add a docker-compose.yml file to the root folder of our next.js application. So, go ahead and create a docker-compose.yml in your root next.js application folder and add below code to that file.
version: "3"
   services:
   frontend:
   build:
     context: .
     dockerfile: Dockerfile
   container_name: frontend
   restart: always
   volumes:
      - ./:/app
      - /app/node_modules
      - /app/.next
   ports:
      - 3000:3000
Now run below code on your terminal.
docker-compose up --build
Now our project is up and running. Any changes you do on your local with reflect on the container side as well. Hope this helped.
You can find the github repository below:
https://github.com/techies23/nextjs-docker